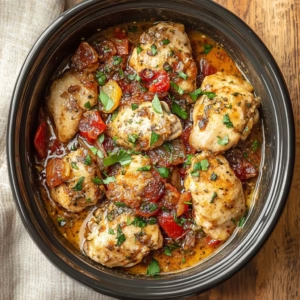
Air Fryer Cheesy Tortilla Garlic Bread is my go-to solution for when I want something comforting but not overly complicated to make. Inspired by summers in the coastal kitchen where my aunt would pull out quick, cheesy treats during family gatherings, this recipe brings that same feeling of warmth and togetherness to your table. Using just tortillas and simple seasonings, you’ll get crispy edges with a gooey mozzarella center that stretches invitingly when you tear into it. It’s the kind of snack you’ll want to make every time your favorite tomato soup needs a companion, or when you need to quickly feed a hungry crowd.
The beauty of this dish lies in its simplicity. There’s no need for dough, rolling pins, or fancy bread types—just flour tortillas. With an air fryer’s rapid heating, you can transform these humble wraps into golden, buttery, garlic-scented bites in under 10 minutes. This method avoids the mess of oven-baked versions while delivering restaurant-quality crisp and creaminess. If your kitchen lacks an air fryer, don’t worry. While the air fryer is ideal, the same principles could be applied to a toaster oven or even a skillet for a more hands-on experience.
What is Air Fryer Cheesy Tortilla Garlic Bread?
This dish merges two popular favorites: crispy, cheesy garlic bread and the convenience of air fryer technology. Instead of traditional Italian bread, flour tortillas act as the base, their soft interior and sturdy shell holding melted mozzarella beautifully. The result is a handheld snack that’s equally good as an appetizer or a sidekick for main dishes. I love how the air fryer’s heat creates those golden, slightly charred edges without the greasy residue of deep frying—perfect for a lighter take on a classic comfort food.
The inspiration came from reworking a childhood favorite. In our family gatherings, my aunt would often slice thick bread, slather it with garlic butter, and top it with cheese for easy serving. But when she brought in a large tortilla wrapped with cheese and herbs into the oven, it became an instant hit. This air fryer method is a modern upgrade. Tortillas are lighter and quicker to assemble, making it ideal for last-minute cravings or feeding a group during movie nights or family game days.
Reasons to Try Air Fryer Cheesy Tortilla Garlic Bread
Who wants to wait hours for a cheese dish to bake? With this recipe, you’ll be serving warm, gooey slices in a total of 10 minutes. It’s perfect for someone juggling work and dinner prep or trying to enjoy a quick snack between playdates and chores. No special tools beyond a mixing bowl and air fryer—yes, your favorite kitchen gadget does more than chicken and fries! The recipe also offers flexibility: swap mozzarella for provolone or add jalapeños for a kick, making it adaptable to almost any occasion or mood.
Ingredients Needed to Make Air Fryer Cheesy Tortilla Garlic Bread
- 2 pieces 8-10 inch flour tortillas (look for slightly thicker ones for better structure)
- 2 tablespoons softened butter (room temperature to spread easily)
- 1 cup shredded mozzarella cheese (pre-shredded or freshly grated for best texture)
- Garlic powder (start with 1/2 teaspoon, adjust to taste)
- Italian seasoning (fresh oregano and rosemary add earthy depth, or store-bought mixes)
- Baking sheet or silicone mat (optional, to handle messy dough if making ahead)
Instructions to Make Air Fryer Cheesy Tortilla Garlic Bread – Step by Step
Step 1: Start by preheating your air fryer to 350°F. This step is crucial for even cooking—most air fryer recipes require preheating to ensure consistent heat from the moment you add the food. As the fryer warms, soften your tortillas by gently warming them under a damp paper towel in a microwave for 20 seconds. Cold tortillas can become brittle during assembly, but this quick tip makes them pliable and easier to handle.
Step 2: Lay one tortilla flat on your work surface like a blank canvas. Grab that softened butter and spread it like frosting over one side of the tortilla, right up to the edges but avoiding the center for the cheese. Think of it as creating a butter border to crisp up nicely while leaving the middle tender. Don’t go overboard—too much butter can make the dish greasy and prevent the cheese from sticking evenly.
Step 3: Generously sprinkle garlic powder over the buttered side. For the freshest flavor, mix 1/2 teaspoon garlic powder with a pinch of coarse salt and a few dashes of dried herbs. This creates a savory garlic butter that feels homemade even if you’re short on time. My personal twist is to stir in a teaspoon of honey if I want a hint of sweetness to balance the cheese, but this is entirely optional for a gourmet touch.
Step 4: Cover the buttered side with a generous layer of mozzarella. I recommend pressing the cheese into the mixture slightly for better adhesion. For an extra-rich version, top half the tortilla with provolone instead of mozzarella—these cheeses melt at different rates and create a more complex flavor profile. The goal is a cheese layer thick enough that it will stretch when pulled but not overflow onto the air fryer basket.
Step 5: Place the second tortilla on top, buttered side up, to form a sandwich. Gently pat the edges together or use a toothpick to secure them. Let me share a lesson I learned the hard way: if you press too hard here, the cheese will ooze and become messy during cooking. I’ve had a few kitchen spills from forgetting this, so aim for light, even compression—perfect for cooking, not overstuffing.
Step 6: Slide the tortilla sandwich into the air fryer basket. If it’s too tall, gently press the stack down (not the tortillas themselves). I use a silicone spatula to avoid tearing the soft layers. Cook for 4 minutes first to ensure the butter caramelizes properly without burning. At the 4-minute mark, check the top tortilla—once golden and crisp, it signals the cheese is fully melted and the sandwich is done.
Step 7: Let the bread rest for 2 minutes while the air fryer works its magic. This cooling time prevents the cheese from pulling apart when you slice it. Remove the bread carefully—it’s hot! Then use a pizza cutter or sharp knife to cut into 8 wedges, like a mini pizza. For a restaurant-ready touch, place the wedges back in the air fryer for 30 seconds at 325°F to enhance browning.
Step 8: Serve immediately while the cheese is still melty and the edges are crackling crisp. If you’re ahead, store them in an oven-safe dish layered with parchment paper and keep them in a warm oven at 200°F for up to 20 minutes. Watch the air fryer closely—each model heats differently, and overcooking can lead to dry tortillas or browned cheese.
Chef’s Tips for a Perfect Result
- Pre-warm tortillas: Microwaving them for 20 seconds prevents cracking
- Use a toothpick: Stabilizes the sandwich and prevents cheese overflow
- Layer cheese carefully: Spread it in a central mound to ensure it doesn’t spill into the basket
- Don’t skip the resting time: Letting it cool prevents cheese from losing its stringiness when sliced
- Experiment with cheese: Gouda adds sweetness; fresh basil complements mozzarella nicely
- Monitor basket placement: Positioning the bread on the lowest rack of the air fryer keeps heat even
Variations and Substitutions
- Double-Devine Baked Alternative: Substitute pre-baked tortilla rounds for extra crispiness. Just ensure the cheese layer isn’t too thick to avoid sogginess.
- Vegan Option: Replace mozzarella with vegan nutritional yeast cheese. Texture may vary slightly—this works well for a dairy-free crowd.
- Gluten-Free Twist: Use 100% gluten-free tortillas for sensitive palates. Pair with mild cheddar for added boldness without overpowering delicate textures.
- Low-Fat Adaptation: Swap butter with light margarine. The cheese still melts beautifully, just with less richness.
- Budget Swap: Substitute flour tortillas with pre-packaged bagel slices. They toast differently but make for an interesting, portable snack with cheese.
How to Serve and Pair
These wedges shine on a cheese board alongside olives, cured meats, and fresh fruit slices. For a cozy evening, I serve them with tomato basil soup or a creamy Caesar salad. If you’re going all-out, drizzle the wedges in a light olive oil and balsamic reduction post-slicing for an extra tangy finish.
A presentation hack I learned from a family friend: Brush the top with a bit of water before air frying. Not only does it prevent browning, but it also helps the garlic butter stick better. For kids, skip the cheese entirely and make garlic tortilla chips—just sprinkle dried parsley instead of seasoning.
Storage and Reheating
Refrigerator: Keep uneaten wedges in an airtight container for up to 3 days. I recommend layering them with parchment paper to prevent sticking.
Freezer: For longer storage, freeze assembled but uncooked tortilla sandwiches on a tray. Once solid, stack them with parchment and reheat directly from frozen for 6-7 minutes at 350°F. The texture holds better than frozen leftovers.
Room Temperature: Enjoy at room temp only if serving within 1 hour. The cheese will remain gooey but gradually lose crispiness. This method avoids drying out the tortillas in a microwave.
Reheating in the air fryer gives the best results. Simply place the stored wedges in the basket and cook at 325°F for 2-3 minutes. Resist the urge to press them down—space matters for even reheating. Alternatively, oven-toasting at 375°F for 7-8 minutes (on a baking sheet) works, though I find the air fryer faster and more consistent.
Nutritional Values
- Calories: 300 kcal
- Protein: 12 g
- Carbohydrates: 30 g
- Fat: 18 g
- Fiber: 2 g
*Approximate values
Frequently Asked Questions
Can I use store-bought shredded cheese?
Yes! Pre-shredded mozzarella works, though freshly grated melts smoother. If using pre-shredded, ensure it’s low-moisture to avoid sogginess. I’ve seen mixed results with higher-water cheeses like soft cream cheese—mozzarella remains ideal.
How do I know when the garlic bread is fully cooked?
Look for golden-brown edges and a slightly bubbled cheese center (not pooling). The tortilla should feel crisp when tapped with a spatula. Check your air fryer’s model—some heat unevenly, so rotating the basket midway ensures consistency.
Why did the cheese become rubbery instead of melty?
Undercooking is the culprit. Tortillas take about 4 minutes at 350°F to crisp properly. Cheese needs that time to fully melt. A mistake I made early on: skipping the preheat and rushing the cook time led to this issue. Always preheat first.
Can I assemble this recipe in advance?
Assembled sandwiches can be refrigerated for 1 hour before cooking. For longer prep, make the garlic butter mixture ahead and store in the fridge. Cover the tortillas separately to keep them soft. This method is how I prepare for large gatherings—batch the butter, then assemble just before cooking.
What’s the best way to customize with herbs?
Replace Italian seasoning with fresh rosemary or thyme. I love sprinkling crushed red pepper flakes for a spicy kick. For something different, try a mix of dried oregano and fennel seeds—it’s inspired by Mediterranean flavors I experimented with after a trip to Sicily.
Conclusion
Air Fryer Cheesy Tortilla Garlic Bread is my version of kitchen alchemy—turning basic ingredients into a melt-in-your-mouth masterpiece. Whether you’re feeding little ones their favorite snack or impressing guests with something novel, its balance of crispy, buttered warmth and gooey mozzarella is unmatched. With each bite offering a golden crunch followed by a rich cheese stretch, this recipe proves how simple ingredients in the right hands—and air fryer—can elevate a snack into a celebration of flavor. Go ahead, assemble a stack and watch it transform in your basket—it’s worth every minute spent in the kitchen.
Print
Air Fryer Cheesy Tortilla Garlic Bread
- Prep Time: 5
- Cook Time: 5
- Total Time: 10
- Yield: 8 servings (4 wedges each of 2 tortillas) 1x
- Category: dinner
- Method: Air Frying
- Cuisine: American
- Diet: Vegetarian
Description
Crispy garlic bread made with flour tortillas and melty mozzarella, air-fried to golden perfection. A quick, crowd-pleasing snack or side for tomato soup or parties.
Ingredients
2 pieces 8-10 inch flour tortillas
2 tablespoons butter, softened
2 cloves garlic, minced
1/2 teaspoon garlic powder
1/4 teaspoon salt
1 cup shredded mozzarella cheese
Optional: fresh parsley or Parmesan for garnish
Instructions
Preheat air fryer to 375°F (190°C)
In a small bowl, mix softened butter, minced garlic, garlic powder, and salt
Cut tortillas into 4 equal wedges each
Brush butter mixture evenly over one side of each tortilla wedge
Place wedges in air fryer basket with buttered sides up
Sprinkle mozzarella cheese over the tortillas
Air fry for 4-5 minutes until golden and crispy
Garnish with parsley or Parmesan if desired
Notes
Use provolone or cheddar instead of mozzarella if preferred
Add diced jalapeños or red pepper flakes for heat
For non-air fryer methods: lightly toast in a skillet or toaster oven at 400°F (200°C) for 4-5 minutes
Nutrition
- Serving Size: 2 wedges
- Calories: 170
- Sugar: 0g
- Sodium: 300mg
- Fat: 10g
- Saturated Fat: 6g
- Carbohydrates: 14g
- Fiber: 1g
- Protein: 6g
- Cholesterol: 20mg