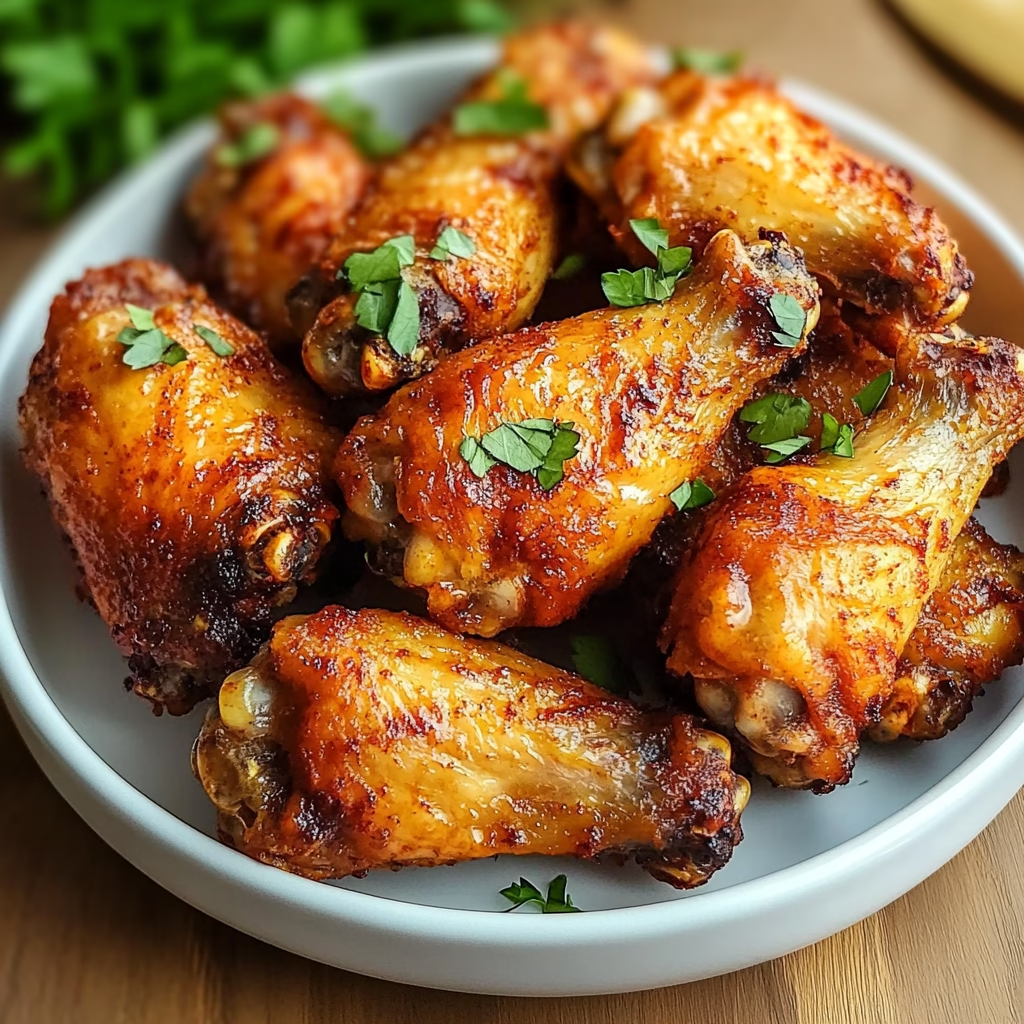
What is Crispy Baked Chicken Wings?
Crispy baked chicken wings are a beloved appetizer that balances bold seasoning with a golden crunch without the need for deep frying. This modern take on a classic dish uses baking powder as a secret weapon to create a light, airy crust while locking in moisture for tender meat. My family’s version draws inspiration from both Southern comfort cooking and global spice blends, offering a smoky depth with hints of garlic and onion. The result is a versatile snack that satisfies cravings for both crunch and flavor.
While traditional fried wings require constant monitoring and consume much more oil, this baked version works its magic in a preheated oven with consistent heat distribution. The baking rack ensures air flows evenly around each wing, creating uniform browning and that coveted crispiness. Feel free to customize the seasoning – I’ve made variations with chili powder, cumin, or even a sweet glaze before – but the core technique creates a perfect canvas for any flavor profile you prefer.
Reasons to Try Crispy Baked Chicken Wings
These wings are a sanctuary for home cooks who want restaurant-quality results without the hassle. In under an hour, you can transform simple ingredients into a satisfying meal that works as everything from party snacks to family dinner main courses. The preparation is dangerously simple – just coat, bake, and rotate – yet the outcome rivals favorite takeout orders. No smoky kitchen filled with oil fumes, no constant stirring needed – just walk away and return to a fragrant, evenly cooked spread.
The beauty of this recipe lies in its flexibility. You can ranch-them-up for classic game day vibes, slather them in buffalo sauce for heat-seekers, or keep them plain for dipping into sauces of choice. They’re equally at home as a family brunch staple or a healthy-ish protein-packed snack. Busy weeknights, casual gatherings, or simply satisfying a late-night chicken craving – these wings adapt to every occasion.
Ingredients Needed to Make Crispy Baked Chicken Wings
2 ½ pounds chicken wings, separated at joints with tips discarded
2 tablespoons neutral vegetable oil
1 tablespoon baking powder
1 teaspoon garlic powder
1 teaspoon onion powder
1 teaspoon salt
½ teaspoon ground black pepper
½ teaspoon smoked paprika
The most important tool you’ll need is a baking rack set over aluminum foil. This allows air to circulate freely underneath while catching any juices. For best results, separate the wings at the joints ahead of time – I always break them apart manually rather than buy pre-portioned ones. (Fun fact: My grandma taught me that whole wings yield that perfect balance of white and dark meat!)
Instructions to Make Crispy Baked Chicken Wings – Step by Step
Step 1:
Preheat your oven to 425°F while you set up the baking station. Line a large baking sheet with heavy-duty aluminum foil (trust me, post-bake cleanup will thank you for this) and place the wire rack on top. Don’t skip the rack – the wings will cook more evenly when lifted above direct heat contact.
Step 2:
In a large bowl, give the wings a gentle toss with vegetable oil. This isn’t just for color – the oil helps the spices adhere better and creates that initial moisture barrier for steam cooking to keep the meat juicy. I like using canola or light olive oil for neutral flavor backing.
Step 3:
Combine all your dry seasonings in a small bowl. This smoky blend of garlic, onion, and paprika was inspired by the spice mix my mother used on grilled chicken. The baking powder might seem unusual, but it’s the key to creating that heavenly crisp while avoiding harsh chemical tastes. Just be sure to taste and adjust seasonings before applying to the wings.
Step 4:
Sprinkle the seasoning mix over the oiled wings and toss thoroughly. The dry ingredients should dust the wings completely but not pile up. If it feels too thick, just add 1/4 teaspoon more oil to help things along. This is when the kitchen starts smelling amazing – prove it to your taste buds that home cooking is just as good as the takeout!
Step 5:
Arrange the wings on the wire rack in a single layer with some space between them. Don’t worry if they’re slightly overlapping – just make sure each piece has room to breathe. (Pro tip: If you’re cooking for a big crowd, do two separate batches; overcrowding leads to soggy consequences.)
Chef’s Tips for a Perfect Result
- Pat wings dry before oiling – this ensures better seasoning adhesion and crispiness
- Use room-temperature chicken (not fridge cold) for optimal cooking
- Don’t crowd the baking sheet – 3-4 inches of space between wings prevents steaming
- Flip halfway through to create even browning
- Rest the wings 5 minutes before serving to redistribute juices
- For extra crunch, broil final 2-3 minutes with close watch
Variations and Substitutions
- Vegan Option: Use whipped chickpea flour instead of chicken and vegan seasoning blend
- Gluten-Free Alternative: Double-check your baking powder is certified gluten-free
- Spicy Twist: Add 1 teaspoon cayenne or use crushed red pepper flakes in seasoning
- Garlic Parmesan Style: Substitute 1/4 cup grated Parmesan in the seasoning mix
- Budget Swap: Look for store-brand canned chicken thighs cut into similar pieces
How to Serve and Pair
These golden wings sing best when paired with cooling or contrasting sauces. Thick ranch or French dressing balances the smokiness, while tangy BBQ offers a Southern twist. For a sweet contrast, try them with homemade honey mustard. At home, we love a simple plate of wings with a squeeze lime and nothing else – the flavor speaks for itself.
Presentation is simple elegance – serve on parchment paper for rustic charm or pair with sliced cucumbers and carrots for a balanced bite. For game days, arrange them in paper cones along with various sauces. Leftover wings work wonders in chicken salads or as taco fillings.
Storage and Reheating
Refrigerator: Store in airtight containers for up to 3 days. Keep any sauces separate to retain crispiness.
Freezer: Freeze uncooked, seasoned wings on baking sheets for up to 1 month. Bake directly from frozen, adding 10-12 minutes to cook time.
Room Temperature: Keep on wire rack for 2 hours maximum in clean, dry areas.
Reheating: Best results from oven (400°F for 10-12 minutes) or air fryer. Tongs work well to adjust positions and re-crisp edges. Avoid microwave at all costs – it turns the skin into rubber!
Nutritional Values
Per serving (4 wings):
• Calories: 290
• Protein: 18g
• Carbohydrates: 5g
• Fat: 20g
• Fiber: 0g
Approximate values.
Frequently Asked Questions
Can I substitute baking powder with something else?
Aluminum-free baking soda mixed with cornstarch (1:1 ratio) is a close match. Both agents help with volume and crispiness, though baking powder gives marginally better texture.
How do I know the wings are perfectly done?
They’re done when the internal temperature reaches 165°F at the thickest part. Visually, the wings will transition from golden to deep amber with slight charring on edges.
Why did my wings come out soggy?
Common causes: overcrowded baking sheet, not using a wire rack, or opening oven too frequently. Always preheat both oven and racks for full results!
Can I prep the wings ahead of time?
Yes! Seasoned wings can be stored in the fridge for up to 24 hours. Just remember to pat extra dry before baking for optimal crisp.
What’s the best way to customize the flavor?
Try changing up the dry blend before coating – lemon pepper, rosemary thyme, or jerk seasoning all work well. For wet sauces, glaze after baking rather than before.
Conclusion
Crispy baked chicken wings prove that outstanding flavors are possible in every home kitchen. With just a few pantry staples and simple technique, you can master this crowd-pleaser that keeps coming back to the table. When that first bite combines the smoky spices with a satisfying crunch, you’ll understand why we often say this is our comfort food staple with a gourmet twist. The sheer joy of making something so delicious from such simple elements reminds us why cooking is truly an art worth celebrating.