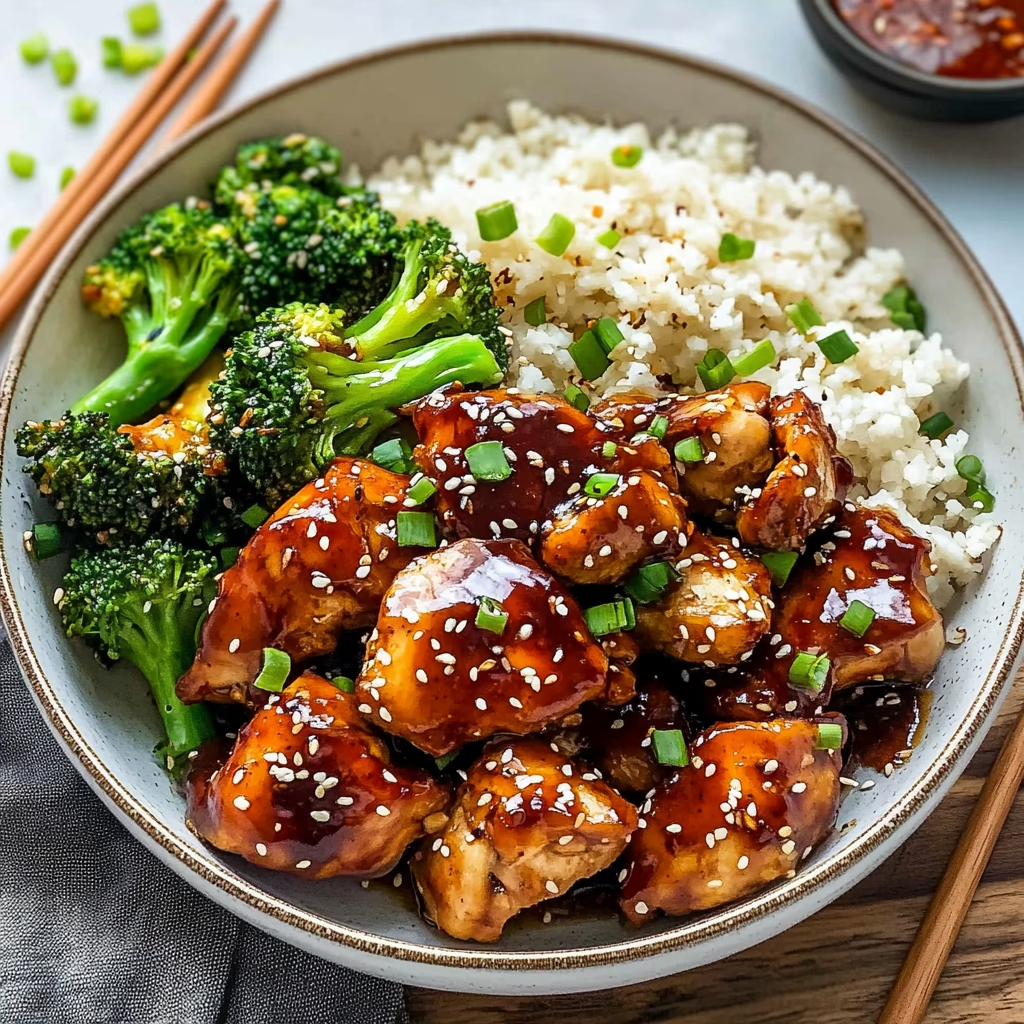
The Best Air Fryer Teriyaki Chicken turns ordinary weeknight meals into something special. Crispy golden skin, tender meat drenched in glossy, savory-sweet sauce—this dish captures the essence of Asian-inspired cooking while making cleanup effortless. Whether you’re a busy parent or a weekend cookout host, the air fryer’s magic delivers restaurant-quality results with less oil and time. Let the tangy-sweet aroma of teriyaki whisk you away to a cozy family kitchen where every bite feels like a hug from the chef’s aunt, who always knew how to balance flavors without overcomplicating things.
What sets this recipe apart is how it elevates chicken into a global comfort food. The air fryer caramelizes the teriyaki glaze better than the stovetop or oven, creating that irresistible char while keeping the inside moist. You’ll rediscover how satisfying it is to serve a dish that screams “home-cooked” but takes 12 minutes to make. Just read through these steps once, let your kitchen tools gather dust until now, and prepare for something entirely new—but deeply familiar.
What is Air Fryer Teriyaki Chicken?
Teriyaki chicken, in its traditional form, is a Japanese method dating back over 400 years. The name combines “teri,” meaning lustrous or glossy surface, with “yaki,” meaning grilled or broiled. This dish marries those ancient cooking roots with modern convenience. Instead of broiling over charcoal or pan-frying like in the East, we use an air fryer’s circulating heat to achieve that perfect outer crisp while sealing in the chicken’s juicy goodness.
The air fryer version simplifies the process without losing its soul. You’ll use just four main ingredients: chicken (thighs or breasts), teriyaki sauce (store-bought or homemade), and optional garnishes like scallions and sesame. But the twist lies in the appliance itself. The air fryer’s high heat intensifies the sauce’s sugars, creating a sticky glaze that clings to the chicken like syrup to a waffle—only with umami depth. In my family, we always served it over steamed rice with a splash of Sriracha for those who liked a kick, a habit I picked up from my aunt who taught me that “grace under pressure” includes knowing how to make teriyaki sing in any kitchen.
Reasons to Try Air Fryer Teriyaki Chicken
This recipe is your shortcut to flavor-packed, protein-rich meals. Let’s face it: life doesn’t pause for marinating meat over charcoal. The air fryer version cuts cook time in half while maintaining that restaurant-worthy glaze your family will crave. If you’ve ever felt intimidated by broiler ovens or deep fryers, the air fryer gives you confidence. No oil mess, no fire danger, just a basket full of possibilities.
For beginners, the instructions are so simple that even my nephew (who once tried boiling water without reading the pot) mastered it. The chicken cooks in minutes, the sauce clings perfectly, and the cleanup is a breeze. Busy professionals love it for packed lunches—freeze a batch and you have ready-to-go meals weeks later. And for families, this is a crowd-pleaser that pairs well with anything from stir-fries to steamed veggies. One bite, and you’ll see why my aunt would say, “If you can make teriyaki right, you’ve cracked the code for comfort food forever.”
What’s more? This recipe adapts flawlessly to dietary needs. Use gluten-free or low-sodium teriyaki sauce, and it still tastes like a party in the mouth. It’s proof that great food doesn’t require complexity or special equipment, just the right touchpoints. Let’s get you cooking it.
Ingredients Needed to Make Air Fryer Teriyaki Chicken
Here’s what you’ll gather—a checklist as streamlined as your meal prep routine:
1–1.25 pounds boneless skinless chicken thighs or chicken breast – Chicken thighs give you juicy, forgiving results. If you choose breasts, check doneness at the 8-minute mark—they cook faster but can’t cry out like thighs when overdone.
⅔ cup teriyaki sauce – Don’t forget to read labels for gluten-free or low-sodium options. My aunt preferred store-bought sauces for that consistent umami kick, but a homemade blend works too.
Chopped scallions (optional garnish) – These add freshness and a pop of green. Leave them off for paleo-style eating, but include them for that “cooked in someone’s home” feel.
Sesame seeds (optional garnish) – Toasted or raw, they provide crunch and a hint of nuttiness. My recipe box always has both kinds, in separate jars like precious spices from a Japanese pantry.
For gluten-free eating: Confirm your teriyaki sauce is free of wheat. Look for labels with cornstarch or arrowroot thickeners, not soy flour. A simple test is to taste the sauce first—if it feels slippery, that’s a gluten signal.
The other trick I learned from my aunt: always cut bones out. Bone-in chicken gives you more moisture, but in the air fryer, we want direct glaze access. Cubes or bite-sized portions maximize surface caramelization. And if you’re using breasts? Trim their tough bits so every piece bites like a tender love letter.
Instructions to Make Air Fryer Teriyaki Chicken – Step by Step
Step 1: Marinate Without Overthinking
Begin by patting the chicken dry. This is the secret weapon of good browning. If the chicken is wet, the air fryer steam will make it rubbery instead of crispy. Use a paper towel or clean kitchen towel to press gently on both sides. Now, cut the chicken into 1-1.5-inch pieces. Chicken breasts should be sliced across the grain for tenderness; thighs can take more size, but keep them uniform so they cook together. Add everything to a medium mixing bowl, then pour in the teriyaki sauce. Toss with your hands until every nook glistens—my aunt would say, “Coat it like you love the chicken.”
Step 2: Air Fryer Setup That Works
Preheat the air fryer to 400°F while the chicken marines. This device acts like a miniature broiler oven, so preheating ensures even cooking. While heating, use a silicone brush or paper towel to lightly coat the basket with cooking oil. I’ve made the mistake of skipping this step before—the first batch stuck like gum to a countertop, and the sauce slid off into the bottom of the fryer. Once the basket is ready, arrange the chicken in a single layer. Don’t cram it—this isn’t stir-frying; we want airflow to work its magic. A second batch is faster than trying to cook everything in one clump.
Step 3: Cook and Baste Like a Prodigy
Let the chicken cook for 12 minutes first. Check the basket halfway through and flip the pieces to avoid one-sided browning. If the glaze looks too thin after marinating, mix an extra teaspoon of cornstarch into the remaining sauce and brush it on during the last 4 minutes. This little tweak gives you that restaurant-quality glossy coat without overdoing the sweetness. Use a silicone brush or even a spoon to coat the tops for extra lacquer.
Step 4: Test Doneness the Right Way
Use a meat thermometer to check the thickest piece—165°F is non-negotiable. I’ve burned my tongue on undercooked chicken more than once, chasing the glaze’s siren song instead of science. If your thermometer reads lower, cook an additional 1-2 minutes. Never rely on color alone. The teriyaki sauce can mislead your eyes into thinking the chicken is cooked when it needs more time in the basket. Once done, let rest for 2-3 minutes. This lets juices redistribute—just like how fresh-caught fish from our coastal town needed to be respected, not rushed.
Step 5: Serve With Personality
Transfer the chicken to a serving dish immediately. Garnish with scallions and sesame seeds for contrast and color. Leftover sauce? Drizzle 1-2 tablespoons over the warm chicken post-cook for extra moisture. My aunt always served this beside a bowl of jasmine rice and a fistful of fresh green beans, but today’s world lets you go bold: try it over zucchini noodles for a low-carb twist. The air fryer’s power makes this a chameleon, perfect for busy weeknights or last-minute guests.
Chef’s Tips for a Perfect Result
- Pat chicken dry before marinating: The drier it is, the better the glaze caramelizes. Wet surfaces make it steam instead of roast
- Flip halfway through: This ensures even browning and prevents the first sides from burning as the second side finishes cooking
- Use high-heat-safe ingredients: Stick to teriyaki sauces with water-based thickeners that won’t char in the fryer’s intensity
- Baste during the final minutes: A quick brush of extra sauce gives you restaurant-level lacquer and intensifies flavor concentration
- Let chicken rest before slicing: This keeps juices in the meat instead of dripping away. Treat it like a roast with short patience
- Choose thighs for tenderness: Chicken breasts can dry out if overcooked. Thighs handle the 75% power of this method better
Variations and Substitutions
Vegan Option
Swap chicken with tofu or seitan. Tofu marinated and air-fried gains a satisfying “meat-like” texture as the sauce grips its structure. For seitan, use the same approach but reduce marinating time to 20 minutes—too long and the wheat base might become spongy instead of chewy.
Gluten-Free Alternative
Opt for tamari-based teriyaki sauce. Check for cornstarch or rice flour as the thickener rather than soy flour (which contains wheat). My aunt used to make her own blend: 3/4 cup tamari, 2 tbsp honey, 1 tbsp rice vinegar, 1 tbsp cornstarch mixed in 1/4 cup water.
Low-Carb Version
Use coconut aminos instead of soy sauce and swap honey for erythritol. The sauce remains sweet-and-savory, but without grain or sugar overload. Just remember to reduce marinating time slightly when using keto-friendly sweeteners, as they can intensify flavors quickly.
Budget Swap
Replace bottled sauce with a homemade version. Mix 3/4 cup soy sauce (or tamari), 2 tbsp maple syrup (or honey), 1 tbsp rice vinegar, 1 tbsp cornstarch dissolved in 1/4 cup water. This keeps costs low while letting you customize the balance of sweet and salty.
Pro Kitchen Hack
Double the glaze and freeze the rest. Thawed sauce revives perfectly for subsequent batches. I always make extra when I’m cooking—teriyaki’s flavor deepens in the fridge, becoming an even better partner for frozen chicken.
How to Serve and Pair
Serve this chicken as a central protein for a complete teriyaki-style meal. My aunt’s favorite pairing was with simple steamed short-grain rice—the teriyaki sauce blends into the grains for something comforting yet elegant. For a modern twist try it with quinoa or cauliflower rice.
Pair it with grilled asparagus for freshness, or charred broccolini for a bolder taste. Need carbs with a kick? Cooked soba noodles or cold udon work beautifully, soaking up any remaining sauce. My family loved it with kimchi on the side too—spicy fermented cabbage balances the sweet-and-sour glaze perfectly.
Party Presentation Ideas
Arrange chicken on a bamboo platter with rice and garnish like it belongs at a food festival. Drape extra sauce in zigzags across the dish for visual flair. For a dinner party trick, skewer the chicken pieces and thread scallions and sesame seeds between them for bite-sized teriyaki kebabs.
Occasion Suggestions
Weeknight dinners: A 15-minute recipe is lifesaving when the kids ask about dinner five times an hour.
Freezer nights: This dish freezes beautifully—portion in single-servings for easy thaw-and-bake meals.
Meal prep lunches: Freeze and thaw chicken in air fryer-safe containers overnight. Reheat at 350°F for 5 minutes to restore crispiness while keeping moisture intact.
Storage and Reheating
Refrigerator
Store cooked chicken in an air-tight container for up to 3 days. I always layer it in shallow containers for faster cooling post-cook. For longer storage, freeze in portioned bags—press out air to keep it crisp in the freezer. Leftover sauce? Store separately; it reactivates well for drizzling later.
Freezer
Freeze chicken in a single layer on a parchment-lined baking sheet first. Once frozen solid, transfer to plastic bags dated with cooking time. Thaw in the fridge overnight before reheating. No need to thaw first for oven or air fryer reheating—the heat will revive it instantly.
Room Temperature
Let cooked chicken sit for 30 minutes after turning off the air fryer. The residual heat finishes the cooking while the glaze sets up for easy serving. This is my go-to shortcut when cooking in batches—place a second air fryer basket under the first while resting.
Reheating
Best method: Air fryer at 375°F for 3-5 minutes. This brings back crispiness without overdoing oil. In a oven? Crank it to 400°F and reheat on a baking sheet covered in parchment paper. Avoid microwave unless you want dry, sad chicken—then brush a teaspoon of water over it to avoid flavor loss.
Nutritional Values
Per serving (4 pieces with 1 tablespoon sauce)
- Calories 220
- Protein 35g
- Carbohydrates 8g
- Fat 7g
- Fiber 0g
Approximate values.
Frequently Asked Questions
Can I replace chicken thighs with ground chicken in this air fryer recipe?
Ground chicken won’t work here. The recipe needs structure to hold the teriyaki glaze properly. Instead, try making teriyaki chicken katsu or chicken skewers with ground meat shaped into patties. Those get the same sticky coating while maintaining texture.
How do I know when the chicken is done without a thermometer?
If you cut into one piece and the inside is opaque with clear juices, it’s done. But air fryers vary—the golden glaze can be misleading. I always rely on temperature: 165°F is the non-negotiable goal for food safety.
Why did my chicken stick to the air fryer basket?
Two common mistakes: not oiling the basket first or overcrowding. I once skipped these steps and had to scrub melted sauce into the fryer. Always preheated and lightly oiled the basket before adding chicken. If it sticks despite that, try using parchment paper (not aluminum) in the basket next time.
Can I make this air fryer teriyaki chicken recipe ahead of time?
Absolutely. Marinate it 24 hours ahead, but cook only when ready to serve. If preparing cooked chicken ahead, reheat at 375°F in the air fryer for best texture. Preparing the sauce in advance gives it extra depth, but store it separately from raw chicken for safety.
What’s the best way to serve teriyaki chicken to kids who hate sauces?
Offer it plain first. If they reject the sauce entirely, cook a second batch without glaze and serve the sauce on the side in a small ramekin. My niece preferred this method. Pro tip: You can also make a teriyaki-infused salad dressing for a sneaky way to get extra sauce onto greens she’ll eat.
Conclusion
The Best Air Fryer Teriyaki Chicken combines simplicity and tradition into a dish that feels both familiar and exciting. With just a few steps, it becomes a weeknight staple that still makes people feel like the chef has been up all night. The key is that sweet-salty glaze crackling on the outside while keeping the chicken juicy inside—it’s like biting into a perfectly timed sunset, where every flavor arrives in harmony.
Print
Best Air Fryer Teriyaki Chicken
- Prep Time: 10
- Cook Time: 15
- Total Time: 25
- Yield: 4 servings 1x
- Category: dinner
- Method: Air Frying
- Cuisine: Japanese
- Diet: Halal
Description
Crispy golden chicken thighs with a glossy, savory-sweet teriyaki glaze, made easily in an air fryer. Quick, oil-free, and packed with umami-rich flavor for a restaurant-style dish in minutes.
Ingredients
1.5 lbs skin-on chicken thighs (4–6 pieces)
3/4 cup teriyaki sauce (ensure low-sodium or alcohol-free if needed)
1 tbsp sesame seeds (optional)
2 green onions, sliced (optional)
Instructions
Preheat air fryer to 375°F (190°C)
Place chicken thighs in a bowl and pour teriyaki sauce over them, coating evenly
Arrange thighs skin-side up in air fryer basket to allow fat to render naturally
Cook for 12-15 minutes, flipping halfway
Optionally brush additional sauce on top and cook 2-3 minutes more for extra gloss
Garnish with sesame seeds and green onions before serving
Notes
Use halal-certified teriyaki sauce to avoid alcohol or pork-derived ingredients
Skin-on thighs ensure juiciness—remove skin after cooking if desired
Marinate for at least 30 minutes ahead for deeper flavor
Store leftovers in an airtight container in the fridge for up to 3 days
Serves 4 as a main dish; pair with steamed jasmine rice and stir-fried vegetables
Nutrition
- Serving Size: 1 chicken thigh with glaze
- Calories: 350
- Sugar: 20g
- Sodium: 2000mg
- Fat: 10g
- Saturated Fat: 3g
- Carbohydrates: 10g
- Fiber: 0.3g
- Protein: 25g
- Cholesterol: 85mg